Covering with Leather
Cover to Cover: Exposing the Bookbinder's Ancient Craft

Before the binder could commence covering they needed to nip off a small piece of each board, at head and tail, near the joint and the headbands. This process, called back cornering, provided the headbands with a place to lodge, without protruding from the sides of the book once it was covered.
It also allowed the boards to open easily, such that they would not drag the headcap (the piece of turned-in leather at the head and tail) out of place. These nicks were made at about a quarter of an inch down the joint and about one eighth of an inch out from the back.
Next, the leather was cut from the animal skin to fit the size of the book, allowing an extra three quarters of an inch or so around all sides. The leather on all four corners could be cut off at an angle of 45 degrees at this point or, if the corners were to be mitred, cut after the leather had been pasted and its edges turned in.
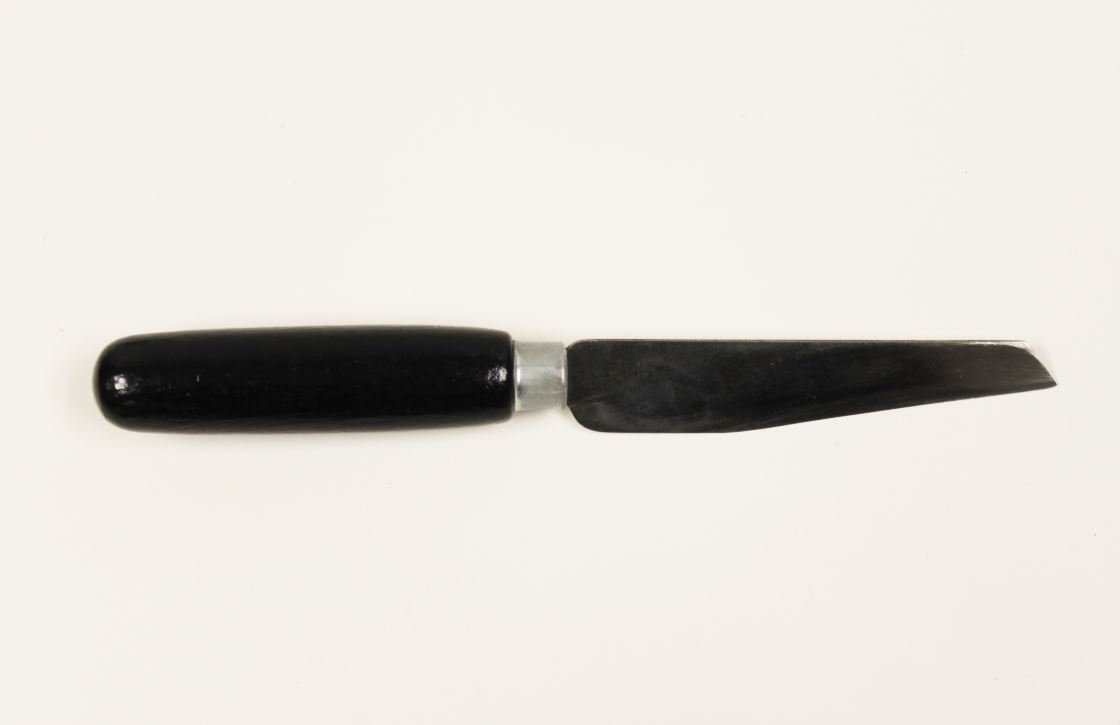
The paring knife is made of high carbon steel and is specially designed to thin leather for bookbinding. It needs to be kept razor-sharp at all times. This can be achieved with a sharpening stone and strop but fine emery cloth can also be used. Pictured here is an English-style paring knife which has an angled blade. French paring knives have a rigid steel blade with rounded edges, whilst Swiss knives have a similar shape but a much longer steel handle. They all require skill and a great deal of patience.
The margins of the cover which were to be turned over the boards had to be pared or thinned down. This ensured a neat finish on the inside of the boards, one in which the bulkiness of the leather would not be obvious once the endpapers were pasted down upon them. Paring required a great deal of skill and, in years past, binders had little choice as to the type of paring knife they used. Today French, German and English blades are readily available and though they looked and felt different to use, each shared a common feature – they needed to be razor sharp. They also required a smooth, flat surface in order to skive effectively, with most binders preferring to use an old lithographic stone. In paring the margins, the leather was placed grain side down, flesh side up, on the stone and the knife held at quite an angle about an eighth of an inch from the leather’s edge. The knife was then drawn downwards or pushed upwards, depending on choice, towards the edge of the leather so that its bulk was removed. This process was repeated on all four sides.
The next step was to paste the leather cover. This was placed on a piece of waste or newspaper, so that the binder’s gluing would not be hampered by concern of going over its edges. Traditionally a flour paste was used, the binder using a brush to apply the paste from the centre of the cover out towards the fore-edge, thus ensuring any stretching of the leather would occur across the width and not the book height. The binder was liberal with the paste; leather pores were thirsty and soaked up most of this first coating. The leather cover was then folded and left so that the paste could penetrate the pores. The binder, meanwhile, nipped up the raised bands, if the book to be covered had them, with band nippers in order that they appeared ‘sharp’ once covered. The leather cover was then opened, pasted up a second time, and laid flat ready for covering the book.
Before covering, the binder always inspected the grain-side of the leather, choosing the more perfect side for the front of the book. With the covers of the book held closed, her or she then placed the back of the book in the centre of the leather, where pencil marks had previously been drawn to indicate the correct position. The left side of the leather was then brought up onto the cover board, the book turned over with its fore-edge facing down, and the other side of the leather left to fall over its board. It should be noted that some binders preferred to place the whole cover onto the pasted leather first, then pull the remaining leather over the book’s back onto the other board. Regardless of method, the binder always took care not to over-stretch the leather, for in drying it would shrink and could pull the boards into unusual shapes.
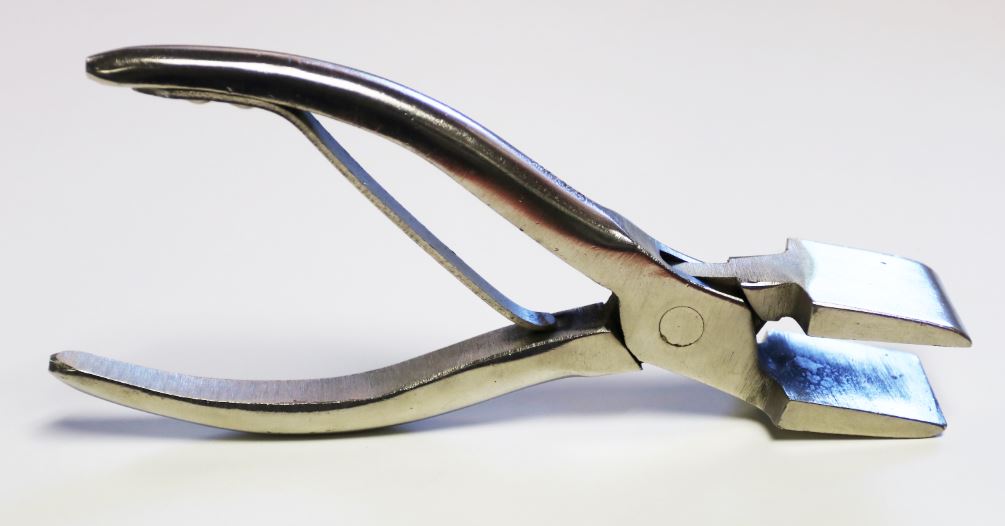
Once the leather on the back had been fixed, the portion across the spine was pulled slightly towards each cord, or ‘band’ as it was now known, to ensure sufficient leather existed to cover them. Band nippers were used again to ensure the paste was taking hold and the leather would not pull away from them. A bone folder or band stick was then used to press the leather, between the bands, firmly onto the spine; this motion was not one of rubbing, for fear of damaging or polishing the leather. The sides of the book were then set by pressing the leather, with a folder, into its joints.
The margins of the leather were now ready to be turned over the boards. The corners of the leather having already been mitred, the fore-edge margins were next pulled over the board edges onto the inside of the cover. The edges and the inside were smoothed down and any excess glue removed. This process was repeated for the head and tail margins, with a little extra paste added to the portion of the leather that was to be turned in behind the headbands.
The cover turned in, the boards were then opened and closed to set them squarely in the joints and a piece of thread or thin cord was wrapped around the book from head to tail, so that it sat in the joint between the back of the book and its sides, or cover. Tying up the book in this way allowed the binder to place the book on its spine and gently mould the leather, using a pointed folder, around the headbands, thus forming the ‘headcaps’. The book was left to dry for an hour or so, the thread removed and, the item dried overnight under some weight.

Occasionally, it was necessary to tie up the book. The leather of larger volumes, particularly across the spine, was prone to lifting whilst the paste attempted to dry. Susceptible books were placed, covers closed, between a pair of binder’s boards, a waste sheet between the cover and text to prevent damage from the glued leather. The boards were tied around their length with a piece of fine string, the spine of the book left to protrude some way above their edges. Folded strips of paper were placed next to the book’s joints and a continuous piece of thread was wound from the underside of the book, over the paper strip and around the underside of the first band. The thread was then taken under the boards again and wound around the other side of the band, the process repeated until all bands were set between the thread. The book was left for up to an hour, then pressed once the paste had taken. A similar method of tying up could also be achieved by using the lying press, the string or cord simply wrapped around the book's bands and the brass pins of the press, as pictured here.
The final step in the process was to paste the endpapers down over the inside cover. This essentially hid the turned-in leather margins and gave the book an appealing finish. Often binders first chose to trim the uneven margins and fill in the board exposed between them with a piece of card equivalent to the thickness of the leather. This prevented any depression or board defects from showing through the endpaper once it had been pasted down. The endpapers were trimmed so that they came just over the leather turn-ins, and the protection sheet, if one was used, was pulled off. The book was then laid flat, a piece of waste paper inserted under the endpaper and the latter pasted up. A little paste was also added along the joint, before the endpaper was smoothed over it and left to fall onto the board. The waste paper was then removed, a clean piece placed over the joint, which was rubbed down firmly again. The book was turned over, the process repeated on the other side, and the book finally left open at the endpapers so as to dry. It was turned over regularly so the endpapers dried evenly for about half an hour, then placed between two boards and very lightly pressed.
Did you know...?
Knowing when, exactly, to close a book once its endpapers had been pasted took quite some experience. If the binder closed the book too early, its endpaper would wrinkle at the joint. If the hinge was allowed to dry too much before the book was closed, a swelling would occur on the outside of the book. A good indication as to whether a book was ready for closing was whether swelling appeared at the joint when the boards were pulled slightly backwards. Then the binder knew it was time to close the book, any small swelling easily smoothed out during pressing.
More on leather...

In order that books may open freely and not look too clumsy, their leather covering should be very thin around the edges that turn over the boards. In the process of paring, the soft flesh side of the leather is carefully thinned around the edge, so that it blends smoothly when glued to the book boards. If pared well, the edge of the leather will barely be visible once the endpapers are pasted over it. A smooth surface is required for paring; most binders prefer to use a lithographer's stone. The leather is placed on this, grain side down, whilst the left hand holds it in place. The English paring knife is taken in the right hand and held at a very slight angle. The knife is then pushed downwards and firmly upwards along the edge of the leather. The movement must be constant, with steady pressure, so that the leather is thinned evenly and not cut off.
Not all books exhibiting the raised band appearance actually have genuine raised bands. These books are in fact hollow backs, their sections sewn on recessed cords or tapes. To give them the charm of the raised cord book, binders applied faux bands, usually pressed strips of leather, to their backs after lining the spine and before covering.

Traditionally, paring of a book’s cover not only involved skiving its edges but also the thin strip where the boards met with the back of the book. Great care was required in estimating the amount of leather to be skived off the leather which would cover the joints. If it was left too thick, the boards (and later the cover) might not open freely. If too much was skived off, or the paring was not smooth, a ridge might have been visible when the book was covered. Overzealous paring also weakened the leather across the joint, the inevitable deterioration causing the board to detach from the spine completely. Conservators spend countless hours rebacking these books, so much so, that the practice of skiving this section has largely ceased.
On display in this cabinet were the following leather bindings:
 |
 |
 |
 |
 |
 |
 |
 |
 |
 |
 |
 |
Also on display in this cabinet were these fascinating leather covers:

De viribus imaginationsis tractus... Thomas Feyens. 1635.
Pictured here is a vellum Yapp-style binding. Though similar in appearance, it is not a traditional "Yapp" binding. The original Yapp binding dates from 1860 and is named after the London bookseller who invented it. The edges (leather or vellum) fall over about half the edges of the textblock to protect it. They also hang over all three edges, not just the fore-edge as in this example. This is more likely a simple "overhanging edge" which was common on bindings of the 16th and 17th century.

Miscellaneous essays... Richard Bulstrode. 1715
Cambridge calf. This style of decoration, which originated with the Cambridge binders in the late 17th century, involved the blanking out of selected areas of the cover. This was usually done with a rectangular panel, the cover then stained or sprinkled around it. When the template was removed alternate areas of plain and stained or sprinkled calf remained. Further embellishments could also be made by blind or gold tooling around the panel. Decorative tools were also occasionally impressed at each panel corner. Often the inner panel was connected to the outer border by means of blind diagonal lines as well.

Orlando Furioso. Lodovico Ariosto. 1783
Tree marbled calf. This style of binding originated in the third quarter of the 18th century. The effect is achieved by the interaction of the copperas and pearl-ash to produce a design resembling that of a tree. It was then highly polished.

Maxims and precepts of the Saviour. Henry Noel Humphreys. 1848
This binding is designed from a peculiar style of ornament, said to be the "Opus Anglicum", much prized in the 10th and 11th centuries. Bound in black leather, with an unusual relief paper overlay of hand-coloured red and green leaves and blue and gold borders, the book is certainly striking. It includes a central onlay of grey paper upon which the title appears blocked in gold and in relief - its smaller letters interspersed between large capitals.
Lee Hayes
May 2018


