Designing online demonstrations
As we come to the end of 2020 and begin to prepare courses for 2021, it might be time to try something new in your online delivery, particularly for courses that are being delivered in the Remote and Dual teaching modes. An incredibly useful teaching technique is to provide them with demonstrations, modeling for students the process of completing a task and the skills and techniques involved. While most of us are familiar and equipped to do this in a face-to-face setting, the move to demonstrating things online creates its own challenges.
There are lots of technologies and tools available that can be utilised and re-purposed to allow you to capture demonstrations for your online students. Most of the options will allow you to create a video file that can be edited, uploaded and shared with students in a variety of ways. While it’s not a definitive list, this post aims to take a look at some of them and provide you with some inspiration.
Suggested technology table
|
|
Maths or scientific equations |
Model or theory visualisation |
Mapping, flow charts, tree diagrams |
Step by step instructions |
Annotation of existing content |
|
Lightboard |
✔ |
✔ |
✔ |
✗ |
✗ |
|
Document Camera |
✔ |
- |
✔ |
✗ |
✔ |
|
Digital inking (stylus) |
✔ |
✔ |
✔ |
✗ |
✔ |
|
Screencast |
- |
✔ |
- |
✔ |
✔ |
|
Plain text |
- |
✗ |
- |
✔ |
✗ |
Tips for using technology
- Create a lesson plan - While many in class demonstrations are off the cuff it’s important when creating a video that you consider your timing and steps. If you’re drawing or writing it might be useful to plan out your visual elements so that you use the whole page/canvas. Don’t be afraid to have a full practice run through - you can always record a couple of takes and splice them together later.
- Use a good quality microphone - Audio is incredibly important and it’s often more important than the quality of the visuals. Using a dedicated microphone rather than the one built into your laptop or PC can dramatically improve the quality of your voice. If you choose an off-camera technique consider using a headset or even the headphones that came with your mobile phone.
- Editing is an option - Remember that most of the tools listed allow you to create a video - and videos can be edited. They allow you to remove mistakes and any off topic remarks. It also allows you to re-record visuals and audio if you need to. If you make a mistake you can go back and fix the mistake or remove it like it never happened in the first place.

Lightboard
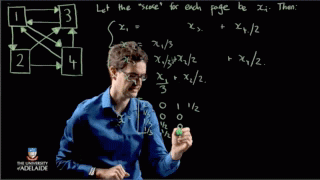
A lightboard (or learning glass) is the closest way to capture a traditional whiteboard teaching experience. The lightboard is perfect for when you want to conduct a mapping exercise, mind map or show how topics and concepts link together. It’s a natural way to work through mathematics and equations as well as develop flow or tree diagrams. The lightboard not only records what's on the board but you, the teacher as well. This helps students make a connection to the person teaching them and provides more context for the demonstration.
Pro tips from an academic … (Dr. Walter Barbieri):
- You can’t use the studio teleprompter due to reflections. Bring notes!
- Sketch out all your equations and processes beforehand so you can pick up any mistakes before committing them to video.
- Don't wear black! The setup in the studio for lightboard videos has a black background, so if you wear black you’ll look like a floating head and arms!
- Pre-draw certain elements (e.g. matrices or tables to fill out). You can draw without talking, and then speed up that section as needed later. You can draw/write the required notes for a section, pause and then record your script. These are edited to be simultaneous at the end.
Document Cam
A document camera is a vertically mounted camera that looks down onto a table top. These are common in lecture theatres these days and there are plenty of dedicated devices available. These can be quite costly but a simple alternative is to use an existing webcam or mobile phone and mount it looking down. You can use a tripod mount, or articulating arms that allow you to move a camera around or get creative and balance your device on a pile of books and use a ruler!
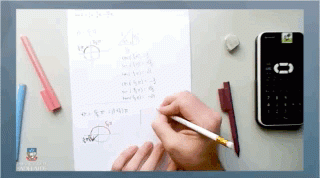
A document camera is great for annotating images and text but also for drawing diagrams, processes and connections. You don’t need any fancy equipment - just pens, textas and paper. A document camera can also be useful for capturing small scale experiments or just showing real life objects, allowing students to see a 3D object and get a sense of its size and scale.

Pro tips:
● Use a high contrast pen or pencil to improve the readability.
● Remember to spell check ahead of time!
Digital inking
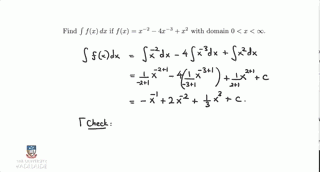
Many modern devices - tablets, laptops and mobile - provide a way to capture ‘digital inking’ or writing on a screen. While you can use a dedicated tablet, like a Wacom, many devices come with a stylus that allows you to do the same thing. Using a whiteboard application or tools like Explain Everything you can create simple recordings of writing and drawing on screen. Solving maths equations is a good example of how you can use this technique but you can also annotate on top of existing images or documents - highlighting text and passages and writing over the text.

Pro tips:
- Do a test recording and check the export settings.
- Remember you have editing tools, you might be able to re-record the audio or visuals if you need to.
Screencast
Screencasts allow you to create a video of whatever is on your screen. These are often used to show students how to use software and application, provide a step-by-step walkthrough of a technical process, or demonstrate data visualisation techniques. But you’re not limited to just these applications - remember you can capture anything that’s on the screen! One thing you should do to accompany any videos with links or downloads as text outside the video - that way students aren’t trying to read your browser bar.
Pro tips:
- Only demonstrate the important bits - you don’t need to show students the whole installation process.
- Narrate what you’re doing on screen (especially keyboard shortcuts), remember students can only see what you’re doing, only what's on screen.

Plain text
Remember that often it’s easier to read text than watch a video. Text can be scanned and read at a speed that suits the student, whereas a video needs to be watched in real-time. Rather than replace your demonstration with text, use it to convey simple information such as step by step instructions (e.g. installation of software), activity directions (software commands or inputs) or to include and hyperlink to resources or downloads. Utilising text in addition to the video means that the video can be short and to the point.
Pro tips:
● You can also Include visuals and screen grabs (even GIF animations) alongside any text.
● Style your actions and keyboard shortcuts appropriately.
● Use a numbered list to make it easy to follow your steps/actions.
